The standard PDF template in BlueSpice Cloud can be adjusted directly in the wiki.
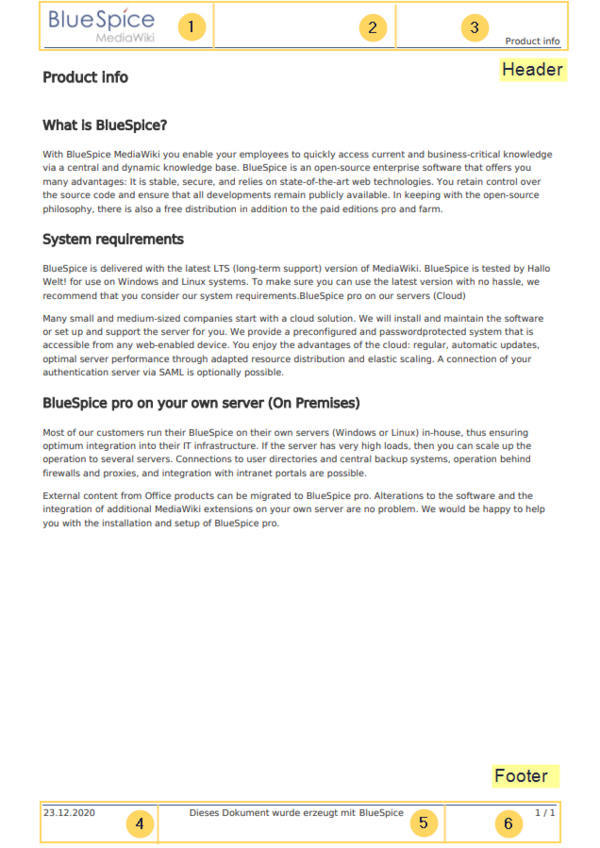
By default, the PDF template contains 3 sections for the header and 3 sections for the footer.
Both the content and the number of columns in the header and footer area can be edited in the following files.
- MediaWiki:UniversalExport/PDF/Default/Header.html
- MediaWiki:UniversalExport/PDF/Default/Footer.html
- MediaWiki: UniversalExport/PDF/Default/Styles.less (optionales externes Stylesheet)
Available parameters
The following content can be added to each section in the header or footer:
| Parameter | Description |
|---|---|
| logo | current wiki logo |
| title | title of the page. In books, this is the title of the book page. |
| subtitle | prints the subtitle of a book if a subtitle was created in the book meta data |
| currentpagenumber | number of the current page |
| totalpagescount | total number of pages |
| url | URL of the wiki page |
| user | username of user who printed the page |
| exportdate | date of PDF-creation |
| exporttime | time of PDF-creation |
Each parameter is added to the header or footer enclosed in three curly brackets, for example: {{{logo}}}.
In addition, you can simply type in regular text in each section.
Header
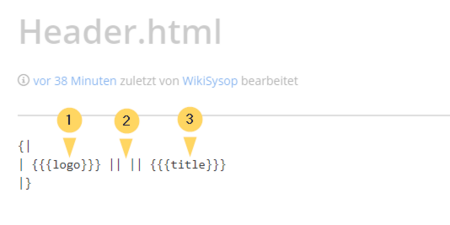
The header contains a wiki table with three columns. The default content for the first column is the logo of the wiki and the last column shows the page title. The middle column is empty.
To make changes to the header, open the page MediaWiki:UniversalExport/PDF/Default/Header.html in edit mode.
Using custom text
If you do not want to show the logo, but display custom text, you can simply delete the existing placeholders and replace them with your text. Be aware that this header will be used for all PDFs on your wiki, including books.
Any of the columns can be left blank.
{|
| Text in left column || Text in middle column || Text in right column
|}
Removing the middle column
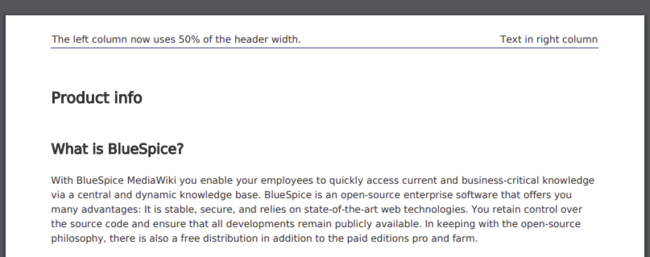
By default, the 3 columns each use 1/3 of the header width. If you need more room for the left or right column, you can remove the middle column. The remaining 2 columns than each get 1/2 of the header width.
{|
|The left column now uses 50% of the header width. || Text in the right column
|}
Adding a margin before and after the header
The margin before and after the header can be adjusted by changing the beginning of the table {| to include a style declaration:
The footer can be customized just like the header.
By default, the footer shows the creation date of the pdf, a BlueSpice disclaimer, and the page number with number of total pages.{|
| {{{exportdate}}} || {{int:universal-export-pdf-default-disclaimer}} ||
{{{currentpagenumber}}} / {{{totalpagescount}}}
|}
{|
| {{{exportdate}}} || {{{user}}} || {{{currentpagenumber}}} / {{{totalpagescount}}}
|}
If you want to use a background-color for the header and footer, you can copy the following style declaration at the end of the page MediaWiki: UniversalExport/PDF/Default/Styles.less:
#runningheaderfix, #runningfooterfix {
background-color: #eee;
}
#runningheaderfix > table {
border-bottom: none !important;
}
#runningfooterfix > table {
border-top: none !important;
}
Book cover
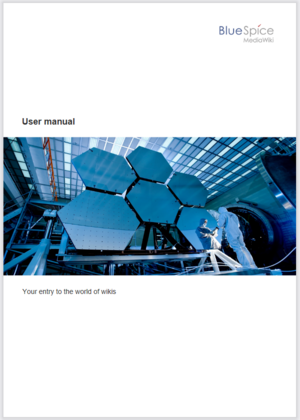
When you print a book to PDF, the book has a basic cover page.
By default, the cover page contains the logo, book title, and a placeholder for the subtitle. If you did not create a subtitle for your book, no subtitle is shown.
Using a cover image
To customize the cover page for books, you will edit the page MediaWiki:UniversalExport/PDF/Default/Cover page.html .
The example shown below contains the following elements:
- Logo
- Background image
- Title
- Subtitle
{{{coverbackground}}}
{| style="width: 100%; text-align: right;"
|{{{logo}}}
|}
<div style="font-size: 18pt; font-weight:bold; margin-top:5cm; color:#333333">{{{title}}}</div>
<div style="font-size: 14pt; margin-top:11.5cm; color:#333333">{{{subtitle}}}</div>
- Lines 1-3: A table with the wiki logo.
- Line 4: Title - here you can define, for example, the font size and font weight, the margin to the top of the page and the font color.
- Line 5: Subtitle - same as the title. The property margin-top sets the distance between title and subtitle.
Defining the background image and the subtitle
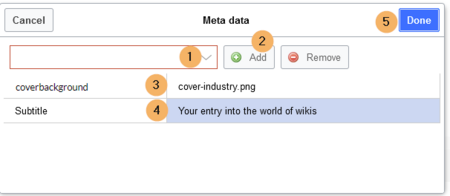
The subtitle and background image are set in the book's metadata.
- Go to the book manager.
- Select the book for which you want to customize the cover page. This should be an image with the full page dimensions (e.g., DIN A4 or letter size) since it will be shown as a background image.
- On the book editing page, click the wrench. This opens the metadata dialog.
- Type coverbackground in the drop-down menu (1) and click Add (2). In the right column, enter the name of the picture that you want to use for the background. The picture must be uploaded to the wiki. If your picture has a namespace prefix, this must be included in the image name.
- Select Subtitle from the drop-down menu (1) and click Add (2). Entehe desired subtitle accordingly in the right column.
- Click Done.
- Finally, click Save at the end of the book editing page.
Now test the layout by printing the book as a PDF using the book management. To make the necessary changes (e.g., spacing between title and subtitle), change the settings accordingly on the MediaWiki:UniversalExport/PDF/Default/Cover page.html or in the metadata.
Using background colors
If you do not have a background image for your book covers or if you don't want to use one, you can also work with colors to customize the cover page.
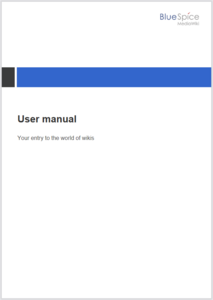
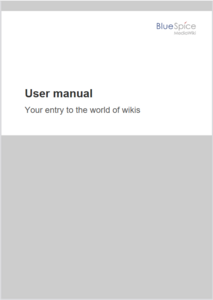
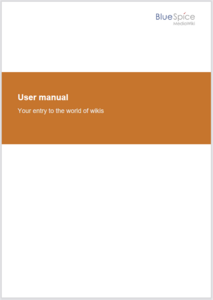
Here are some examples and the needed source text for the page MediaWiki:UniversalExport/PDF/Default/Cover page.html. To use them, simply overwrite the existing content in that page.
<!-- Logo -->
{| style="width: 100%; text-align: right;"
|{{{logo}}}
|}
<!-- Color block -->
<div style="position:absolute; height:2cm; width:1.8cm; background-color:#3a3b3c;
margin:4cm 0 0 -2cm">
</div>
<div style="position:absolute; height:2cm; width:24cm; background-color:#3366cc;
margin:4cm 0 0 0cm;">
</div>
<!-- Title -->
<div style="font-size:28pt;font-weight:bold;margin:8.5cm 0 1cm 0;color:#333333;">{{{title}}}
</div>
<!-- Subtitle -->
<div style="font-size:16pt; color:#555555">{{{subtitle}}}
</div>
<div id="coverpage" style="height:29.7cm; width:21cm; margin:-1cm 0 0 -1.5cm;background: #cdcdcd; overflow:hidden;">
<div style="min-height:10cm; background:white; margin:2cm 0 0 0; padding:1cm">
<!-- Logo -->
{| style="width: 100%; text-align: right;"|
|{{{logo}}}
|}
<!-- Titelblock -->
<div style="font-size: 32pt; font-weight:bold; padding:0 1cm; margin:4.5cm 0 0.5cm 0;color:#333333; background:white">{{{title}}}</div>
<div style="font-size: 24pt; margin-top:0; padding:0 1cm; color:#555555;">{{{subtitle}}}
</div>
</div>
<!-- Logo -->
{| style="width: 100%; text-align: right;"
|{{{logo}}}
|}
<!-- Title block with background color -->
<div style="background-color:#c6752d; margin:4.5cm -2cm 0 -2cm; padding:2cm 2cm 3cm 2cm;">
<div style="font-size: 24pt; font-weight:bold;  margin-bottom:0.5cm; color:#ffffff;">{{{title}}}
</div>
<!-- Subtitle block -->
<div style="font-size: 18pt; margin-top:0.5cm; color:#efefef">{{{subtitle}}}
</div>
</div>
Tags
Landscape printing
To print a PDF page in landscape format, the following tag can be inserted in the wiki page in source editing mode at any position:
<bs:ueparams template="BlueSpiceCloudLandscape" />
To make it easier for the user to add this tag with the visual editor, this tag can be added to a wikitext-template, for example, {{LandscapeFormatExport}}. The element can be inserted anywhere on the page.
Related info
