(Changed categories.) |
m (Text replacement - "BlueSpice Cloud" to "BlueSpice cloud") |
||
| Line 1: | Line 1: | ||
{{DISPLAYTITLE:Invite users}} | {{DISPLAYTITLE:Invite users}} | ||
{{BSVersion|bsvFrom=4.2|bsvTo=|bsvFeature=Available in BlueSpice | {{BSVersion|bsvFrom=4.2|bsvTo=|bsvFeature=Available in BlueSpice cloud and}} | ||
==Inviting a user== | ==Inviting a user== | ||
| Line 40: | Line 40: | ||
<br /> | <br /> | ||
{{Box Links-en|Topic1=|Topic2=[[Reference:InviteSignup]]}} | {{Box Links-en|Topic1=|Topic2=[[Reference:InviteSignup]]}} | ||
[[Category:BlueSpice | [[Category:BlueSpice cloud]] | ||
{{Translation}} | {{Translation}} | ||
[[Category:Permissions]] | [[Category:Permissions]] | ||
Latest revision as of 10:51, 7 June 2024
Inviting a user
The invitation page opens via the email icon in the user administration.
An invitation has the following features:
- Invited users receive an invitation email.
- The invitation email contains a link to the wiki. The invited person can use this link to choose a username and password.
- After the user account has been created by the invited person, there is no special group assignment. The permissions of the general group "user" are assigned to the user account.
Invitation page
The invitation page allows to send an email invitation to new users.
After providing an email address and clicking Add, an email is sent to the invited user. The invited person can create their own login information by following the sign-up link in the email invitation.
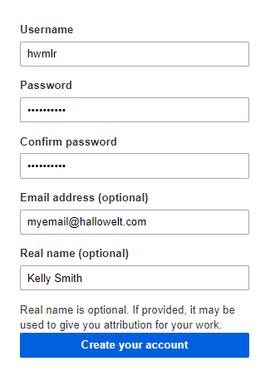
When the invited user clicks on the provided sign-up link, the page Create account appears in the browser. The user can now create a wiki account.
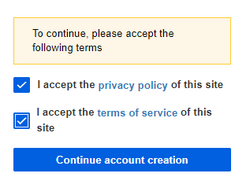
After clicking Create your account, the user is asked to accept the privacy policy and terms of service.
After checking both checkboxes, the user can finish the account creation process and is automatically logged in.
Deleting invitations
As long as a user has not created an account, the invitations can be deleted. Simply click on the delete button next to the invitation.
Creating user accounts on behalf of users
If an administrator sends out invitations to users to create their own accounts, users can freely choose their username and passwords. As an alternative, administrators can directly create users accounts via the page Special:CreateAccount. In this process, users receive an email with a random temporary password, but with a username that was created by the administrator.


